


Table of Contents
Google Login #
If you want to enable your Google login then go to https://console.firebase.google.com and find your project that you have already created for push notification setup then open your Project->Authentication->Sign-in method-> Add new Provider->Additional providers then select Google and enable finlay Save.
Android Setup : #
- You need to set a fingerprint in firebase, go to Project >Project settings > Android apps then select your user app at the bottom you will find add fingerprint then enter your SHA1 and SHA256 and Save. Visit this site here you will get the instruction how you will get SHA1 and SHA256 Link
- After publishing on the play store you need to add your SHA1 and SHA256 form App integrity. To found App integrity App signing, go to google play console Project-> Release > Setup > App integrity > App signing
- Download your google-service.json file and Copy that file and paste it under <project>/android/app/ folder.
iOS Setup : #
- Go to your downloaded GoogleService-Info.plist file, there you’ll find REVERSED_CLIENT_ID, copy this.
- Go to <project>/ios/Runner/Info.plist and add your Client ID
dict>
   <key>CFBundleTypeRole</key>
   <string>Editor</string>
   <key>CFBundleURLSchemes</key>
   <array>
       <string>YOUR_REVERSED_CLIENT_ID</string>
   </array>
</dict>
Web Setup : #
- Go to <project>/web/index.html and set your CLIENT_ID
<meta name="google-signin-client_id" content="YOUR_CLIENT_ID">- Go to your https://console.cloud.google.com/apis/credentials/oauthclient then add your web app hosted domain in Authorized javascript origin section.
- APIs and Services -> Credentials -> OAuth 2.0 Client IDs set your domain there. Like: https://demo.com
Facebook Login #
- If you want to configure Facebook login in your project then create your own app form https://developers.facebook.com/apps
- Configure your app settings from App Settings->Basic with your own Display name, Contact email, Privacy Policy URL, Terms of Service URL, App icon, web app domain
- Add Facebook Login form products section .
- Add your platform (web/android/ios) with click Add platform and configure your app.
- To Configuration settings in the app, Facebook Login->Settings->Client OAuth settings enable Client OAuth login, Web OAuth login, Enforce HTTPS, Use Strict Mode for redirect URIs, Login with the JavaScript SDK.
- Also, you need to add your Allowed Domains for the JavaScript SDK (ex- https://6ammart-web.6amtech.com)
- To get profile information you need to request access in App Review->Permissions and features get access for public_profile
- Now open your flutter project go to <project>/lib/main.dart and replace with your facebook appID
- For android go to <project>/android/app/src/main/res/values/string.xml and set value.
<resources>
  <string name="app_name">6amMart</string>
  <string name="facebook_app_id">YOUR_APP_ID</string>
  <string name="fb_login_protocol_scheme">fb_YOUR_APP_ID</string>
  <string name="facebook_client_token">Go_to_your_fb_app->Settings->Advance->Security->Client token</string>
</resources>- For ios go to ios/Runner/Info.plist and set value
<array>
   <dict>
       <key>CFBundleURLSchemes</key>
       <array>
         <string>fb_your_app_id</string>
       </array>
   </dict>
<array>

<key>FacebookAppID</key>
<string>app_id</string>
<key>FacebookClientToken</key>
<string>
   Go_to_your_fb_app->Settings->Advance->Security->Client  token
</string>
<key>FacebookDisplayName</key>
<string>name</string>
- For the web go to <project>/lib/main.dart set your appID.
await FacebookAuth.instance.webAndDesktopInitialize(
appId: "YOUR_FB_APP_ID",
   cookie: true,
   xfbml: true,
   version: "v15.0",
);
Apple Login #
To configure Apple Login follow the steps mentioned below –
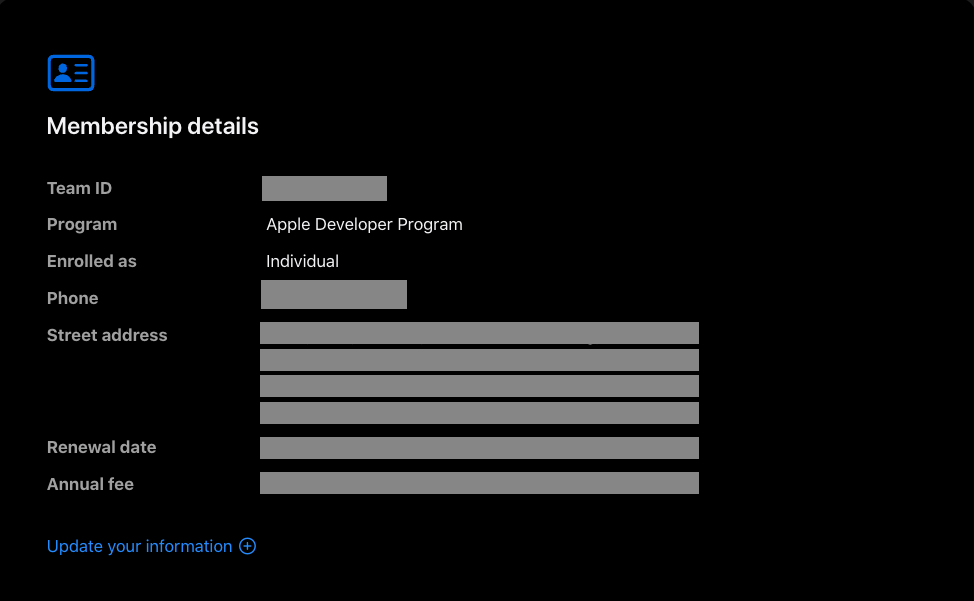
Step 1: Find out Team ID
- Visit the Apple Developer page.
- Go to Account and find the Membership details section. There you will find TeamID.
Step 2: Create or Use App ID
INFO
If you already have an App ID that you want to use for Apple Sign-In, you can skip creating a new one and proceed to the next step.
- Go to the Identifiers list.
- Click the Plus icon besides Identifiers, and then select App IDs and continue
- Select type App and continue.
- Provide a brief description and a Bundle ID (the same one used for your app). This identifier will serve as the Client ID for Apple Sign-In.
- In Capabilities, select the required options like Push Notifications, Sign In with Apple, and Associated Domains.
- Click Continue and proceed.
Step 3: Create Service ID
- Go again to the Identifiers list.
- Click the Plus icon besides Identifiers, and then select Service IDs and continue
- Add a description and an identifier for your service, then click Continue
- Download the file labelled as AuthKey_example.p8. This is the Service File, and the segment “example” within the file name is indicative of the KeyID. To illustrate, if your file is titled AuthKey_XXXXXXXXXX.p8, then XXXXXXXXXX signifies the KeyID.
Step 4: Submit Data in Admin Panel
- Go to the Admin panel.
- Navigate to Configurations > 3rd Party > Apple Login setup your data.
- Use the following information:
- Client ID: The Bundle ID you previously specified.
- Team ID: Obtained from the Apple Developer page.
- Key ID: KeyID from the AuthKey_example.p8 file name.
- Service File: Downloaded AuthKey_example.p8 file.
- Save and enable Apple Login status.
By following these steps, you can successfully set up and implement Apple Sign-In in your Project.


