


Local #
Choose the right development environment for your local machine based on the operating system. Follow the instructions below for a smooth setup:
1. Windows (XAMPP):
– Download and install XAMPP to set up a comprehensive local development environment on Windows.
2. Linux (LAMP):
– Configure the LAMP stack on your Linux distribution for the local development environment.
3. MacOS (MAMP):
– Install MAMP to establish a compatible local development environment on MacOS.
Each choice gives you a flexible setup that fits well with your computer’s system. Watch the tutorial videos for step-by-step help while installing.
TIP
Recommended tutorial is below 👇
CPanel #
Database Configuration #
Before starting the admin installation, the database must be configured for the application.
For creating the database, the following ways must be maintained-
- Go to MySQL Databases
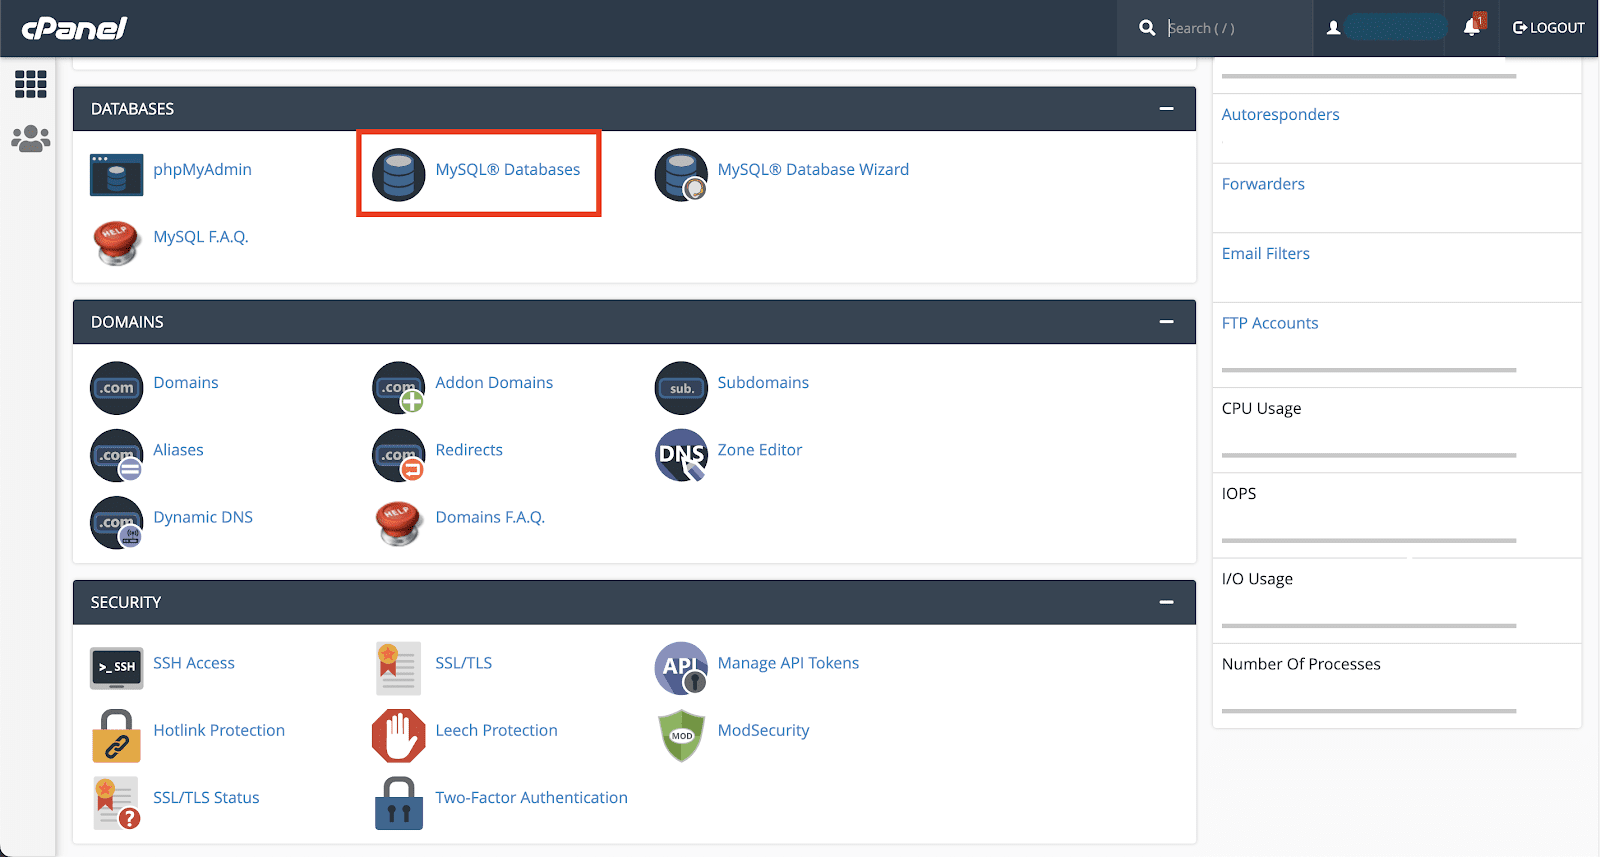
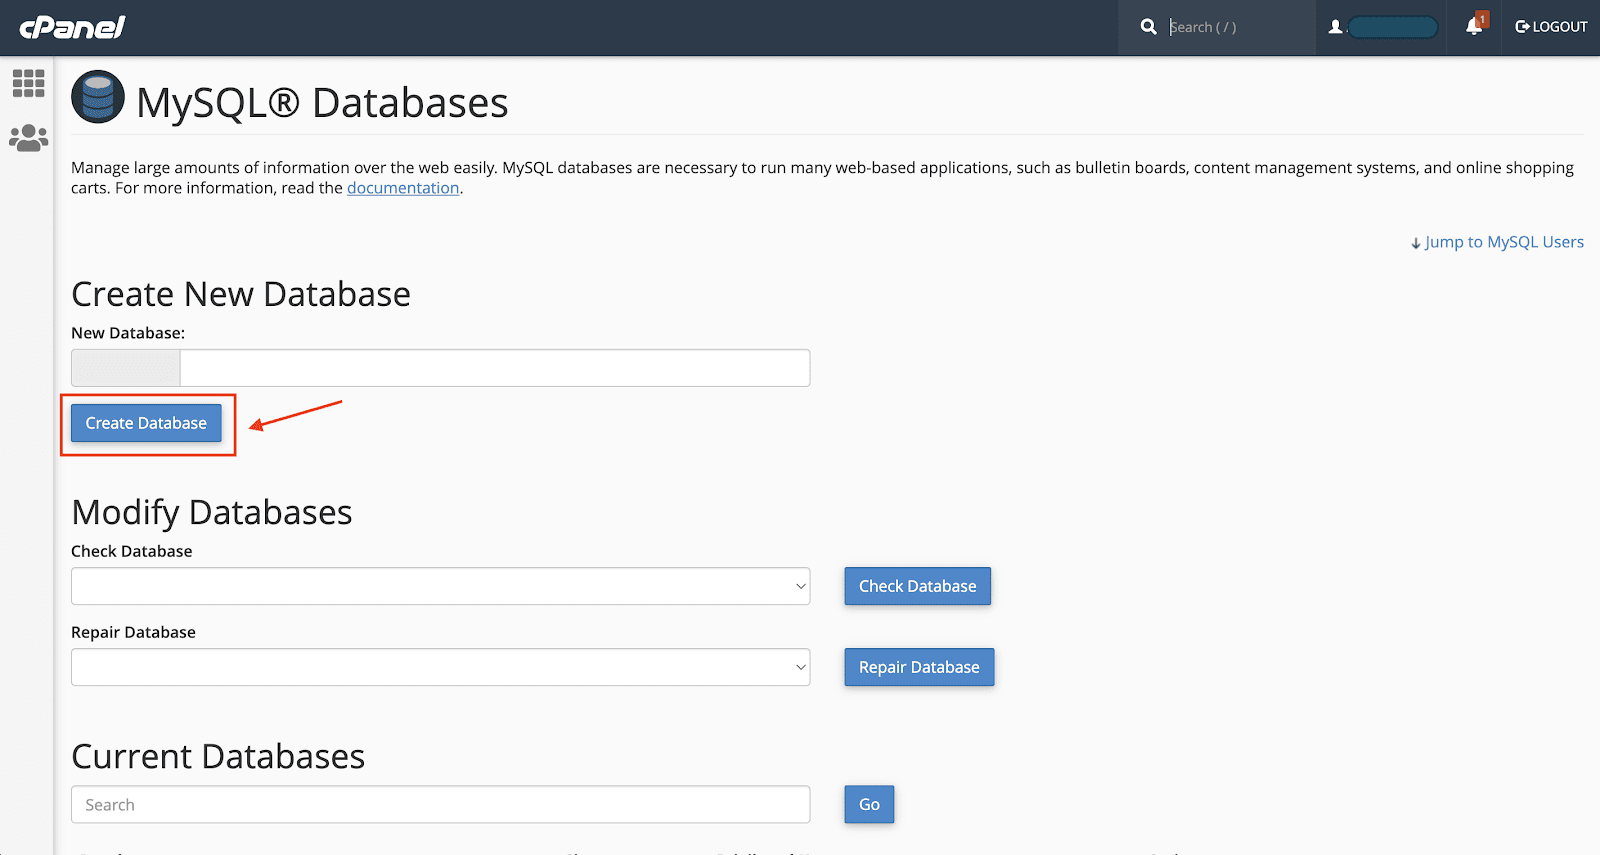
- Create a new database for the application
- Create a user for the database
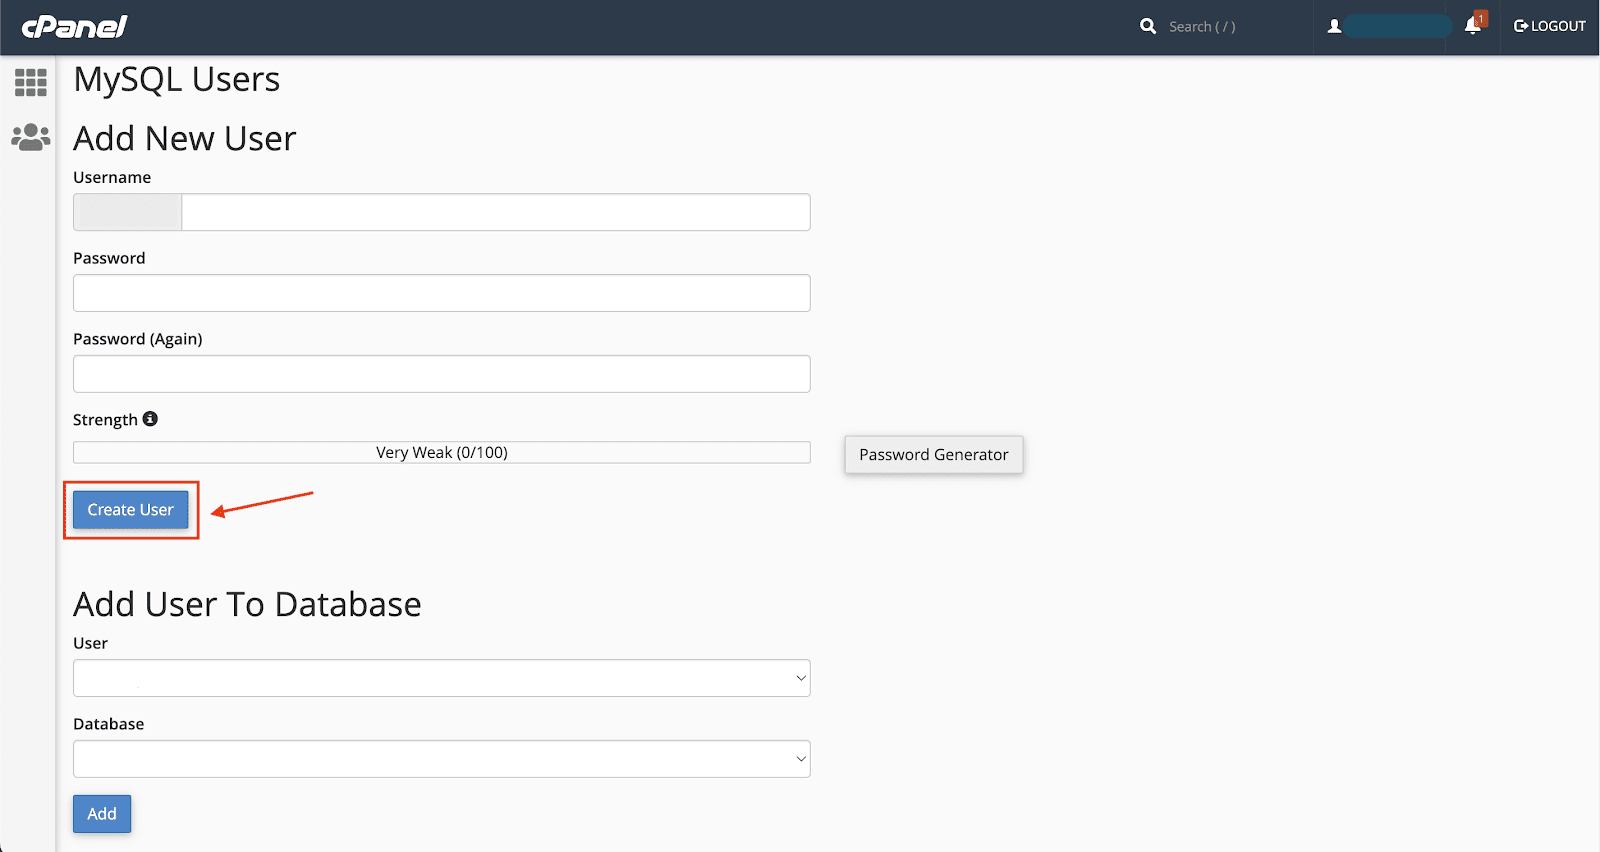
WARNING
Avoid using hash (“#”) in your password
- Add the user to the database
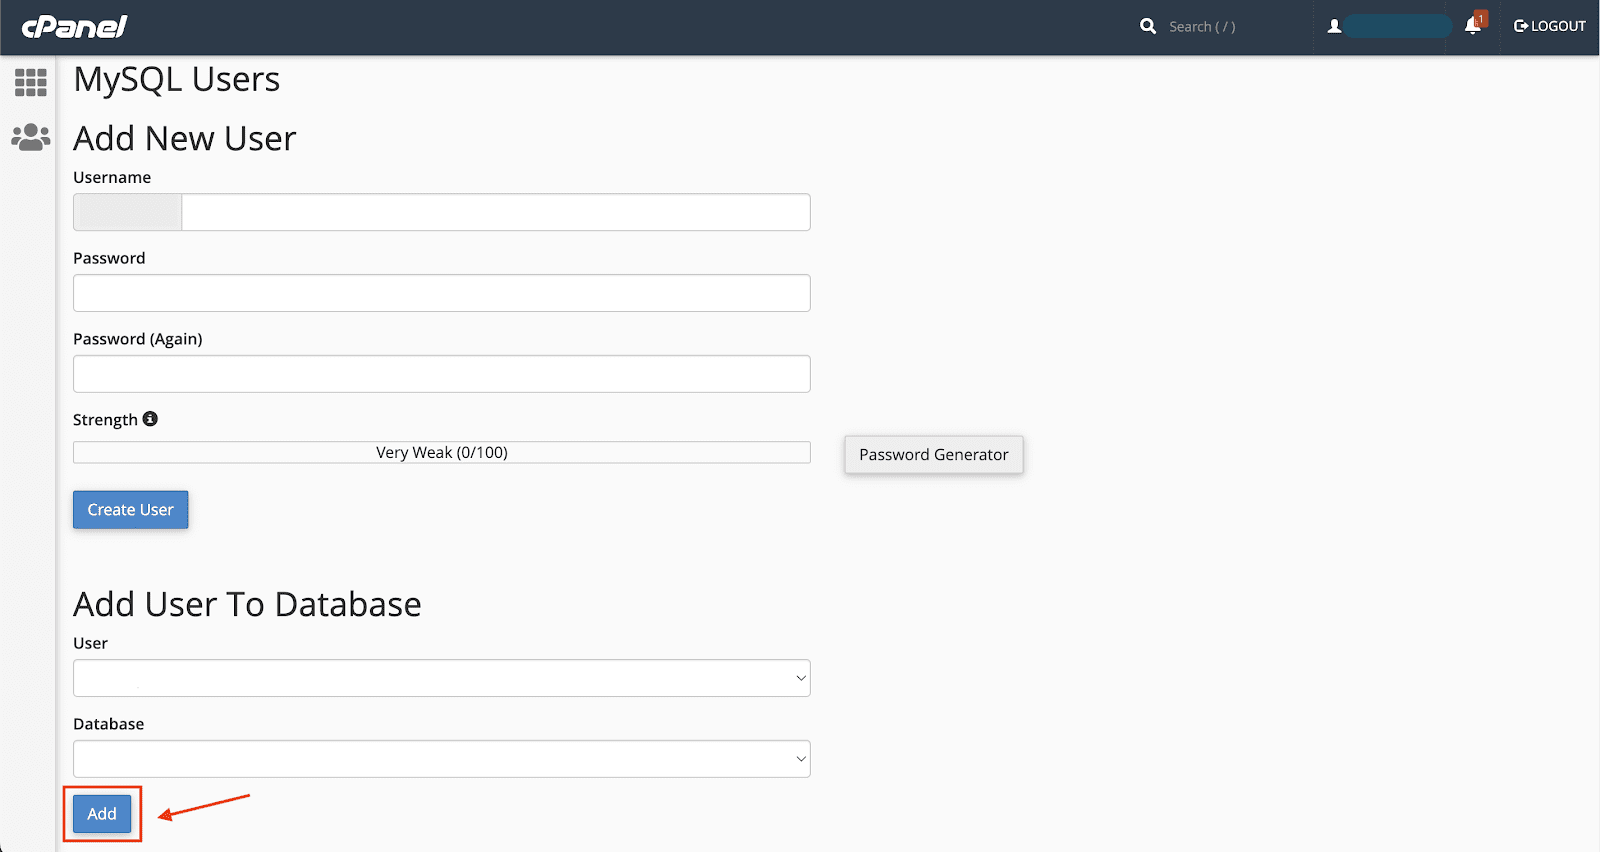
- Give privileges to the user
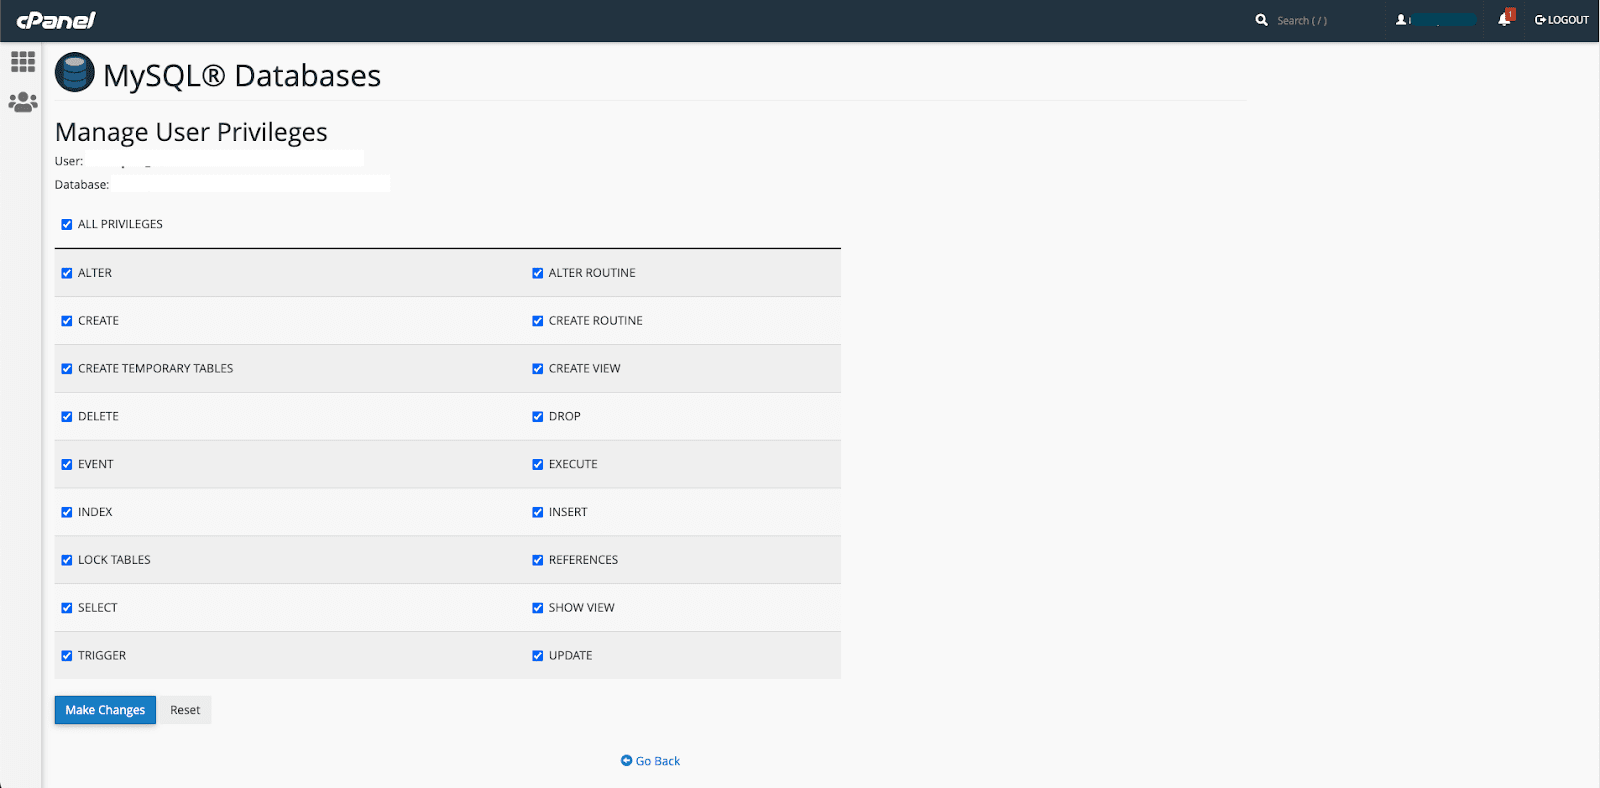
Info
From one hosting provider to the next, the interface or step differs. Speak with your server provider if you’re having trouble configuring the database. You can also get in touch with us for any type of consulting if you need it.
TIP
Recommended tutorial is below 👇
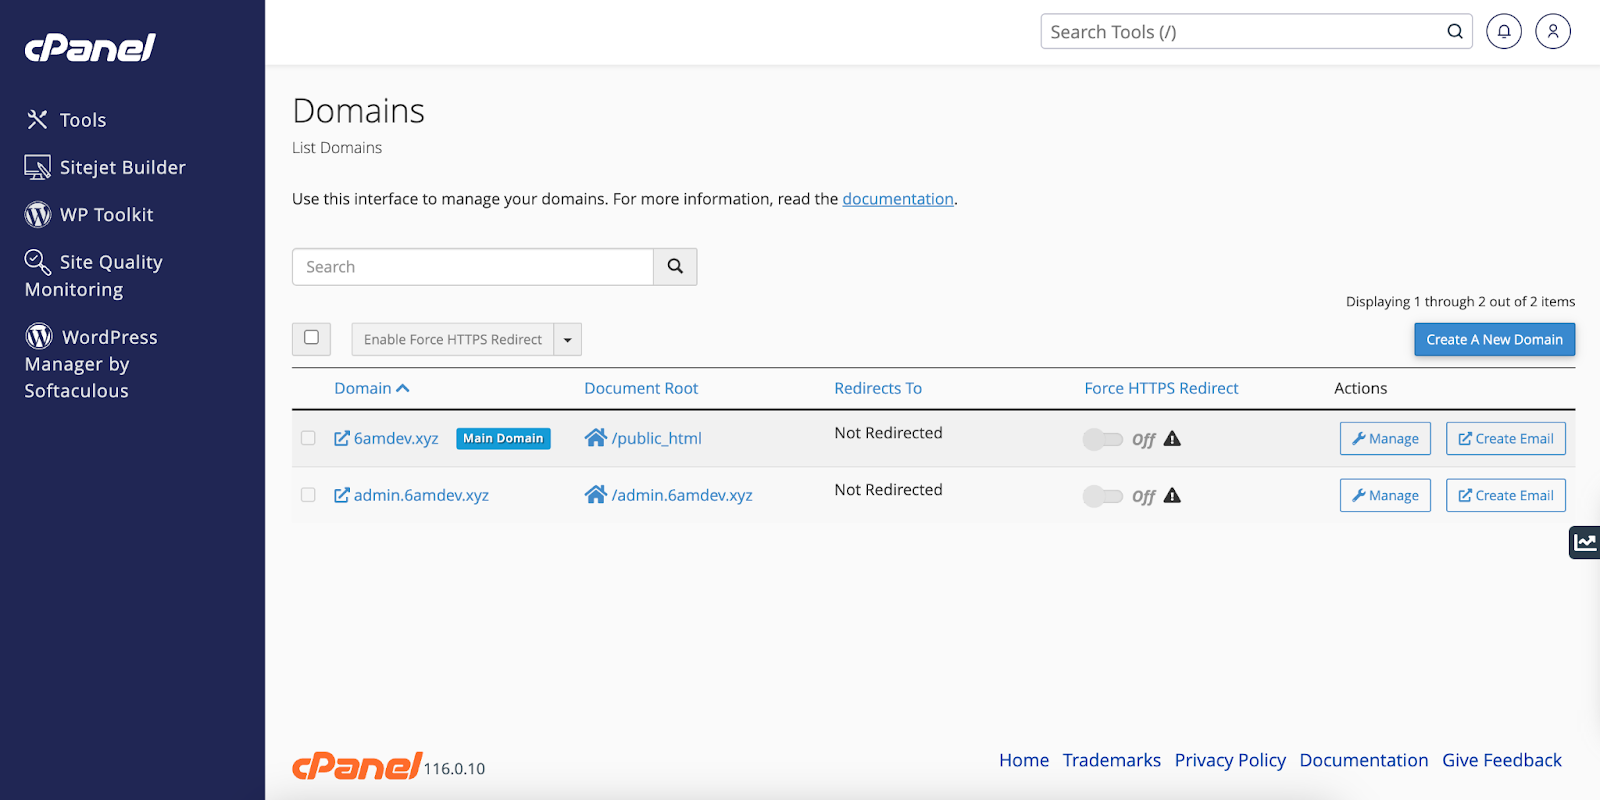
Domain Configuration #
Navigate to your cPanel and locate the page for domain configuration. For 6amMart, it is essential to have two domains or subdomains. Utilise your main domain to host the customer web panel.
Additionally, create a subdomain for the admin panel. For instance, if your domain is ‘example.com’, generate a subdomain such as ‘admin.example.com’ and host the admin panel on that subdomain.
TIP
Recommended tutorial is below 👇
Digital Ocean #
Initially, you must configure a droplet to host your application, allowing you to modify the configuration according to your business needs. We advise a minimum specification of 2 cores CPU paired with 4GB of RAM, with the option to increase resources for larger client bases.
Refer to the tutorial for additional details and guidance.
TIP
Recommended tutorial is below 👇
Server Setup #
To host an application on a Virtual Private Server (VPS), you need to configure the LAMP stack, which serves as the environment for PHP/Laravel applications. LAMP comprises Linux, Apache2, MySQL, and PHP. Alternatively, NGinx can be used instead of Apache2, but this tutorial focuses only on Apache2 configuration.
Installing LAMP Stack #
This guide will walk you through the process of setting up a LAMP stack on an Ubuntu server. Make sure you have an Ubuntu server instance with sudo privileges.
Run the following commands for installing required things-
- Step 1: Update Package Lists
sudo apt update- Step 2: Install Apache
sudo apt install apache2 -y- Step 3: Install MySQL
sudo apt install mysql-server- Step 4: Install PHP
sudo apt install php libapache2-mod-php php-mysql- Step 5: Test PHP Processing
echo "<?php phpinfo(); ?>" | sudo tee /var/www/html/info.php- Step 6: Additional PHP Modules
sudo apt install php-bcmath -y
sudo apt install php-ctype -y
sudo apt install php-json -y
sudo apt install php-mbstring -y
sudo apt install php-openssl -y
sudo apt install php-pdo -y
sudo apt install php-tokenizer -y
sudo apt install php-xml -y
sudo apt install php-zip -y
sudo apt install php-fileinfo -y
sudo apt install php-gd -y
sudo apt install php-sodium -y
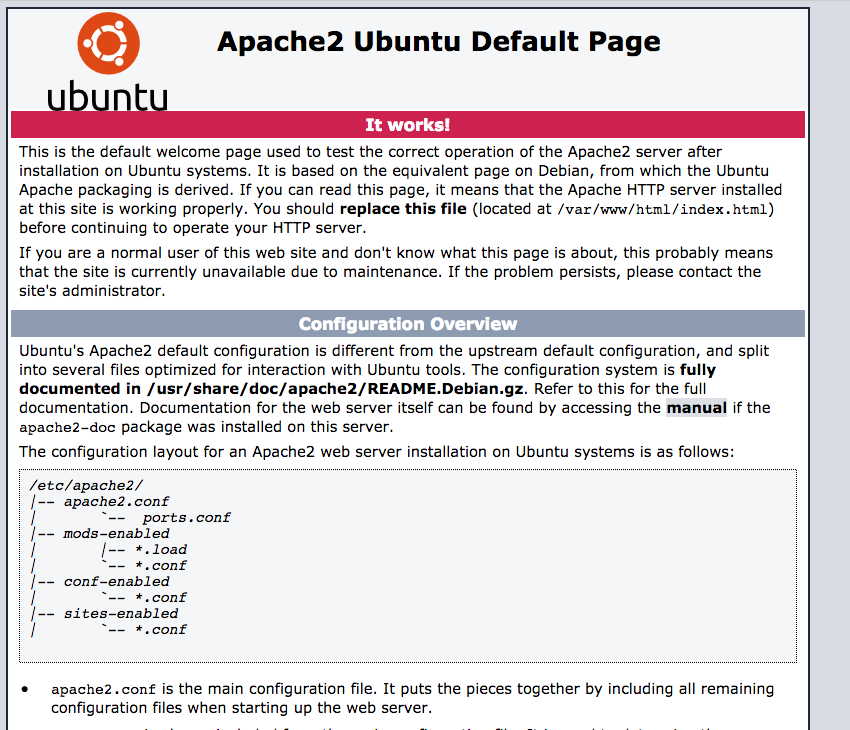
sudo apt install php-mysql -yAfterward, access the IP address, and you’ll be directed to the default Apache configuration page.
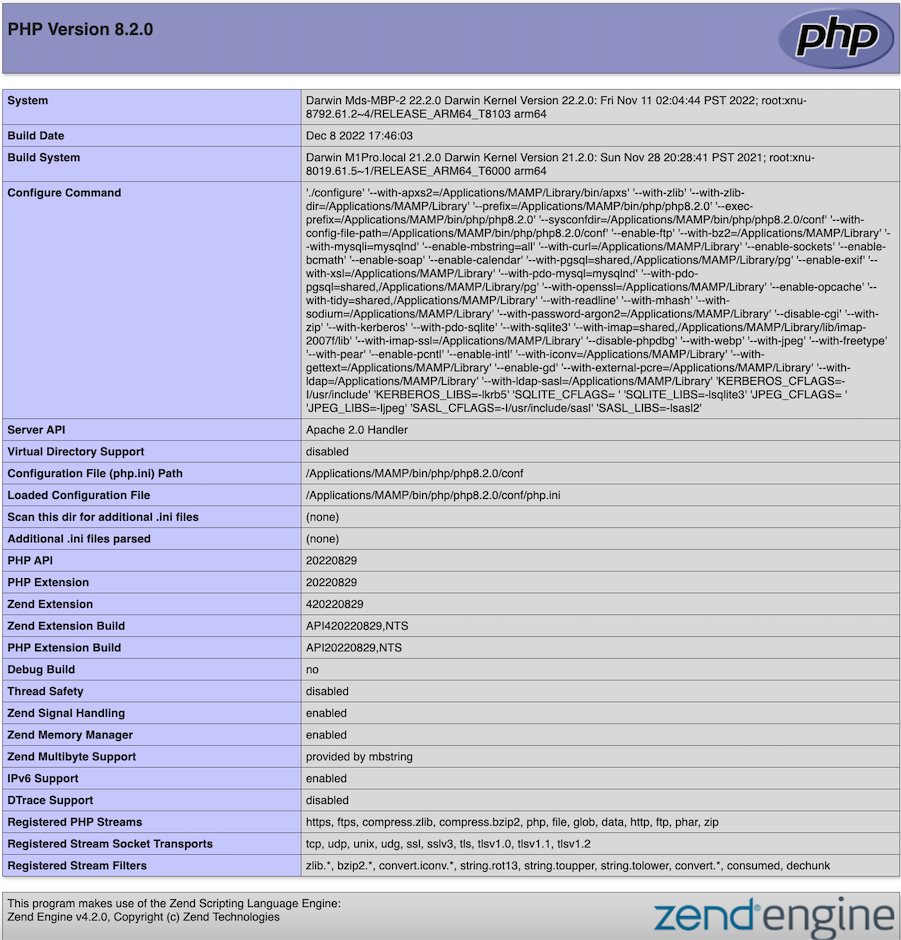
Check if the php is working correctly or not by hitting the URL YOUR_IP/info.php and you can see the system’s PHP configs.
Info
The following configurations are only for UBUNTU distro.
TIP
Recommended tutorial is below 👇
Configure domain/sub-domain #
Make sure you have an Apache web server installed. For configuring domain or sub-domain in your VPS server, you must configure a vhost (Virtual Host) configuration file. Follow the steps below to configure vhost config file for both domain or sub-domain-
- Step 1: Navigate to Apache Sites Directory
cd /etc/apache2/sites-available/- Step 2: Create a Virtual Host Configuration File
sudo nano /etc/apache2/sites-available/your_domain.com.confAdd the following content:
<VirtualHost *:80>
    ServerAdmin webmaster@your_domain.com
    ServerAlias www.your_domain.com
    ServerName your_domain.com
    DocumentRoot /var/www/your_domain.com/public_html

    <Directory /var/www/your_domain.com/public_html>
        Options -Indexes +FollowSymLinks
        AllowOverride All
        Require all granted
    </Directory>

    ErrorLog ${APACHE_LOG_DIR}/error.log
    CustomLog ${APACHE_LOG_DIR}/access.log combined
</VirtualHost>
Save the file and exit the text editor.
- Step 3: Enable the virtual host configuration file
sudo a2ensite your_domain.com.conf- Step 4: Reload the Apache2 server
sudo systemctl reload apache2- Step 5: Test the Virtual Host
Open your web browser and navigate to http://your_domain.com. You should see your website.
Info
The following configurations are only for UBUNTU distro.
Domain propagation #
- Domain propagation refers to the process of updating DNS (Domain Name System) records across the internet, allowing a newly purchased domain or subdomain to become accessible globally.
- To initiate the process, configure an A record for your domain and CNAME record for your subdomain. Alternatively, if preferred, you can opt to create an A record for your subdomain instead of a CNAME record.
Info
Once DNS changes are made, propagation begins. It can take anywhere from a few minutes to 48 hours for DNS changes to propagate worldwide. During this time, some users might see the old site while others see the new one.
TIP
Once your domain is propagated, check from the follow site – https://dnschecker.org/
Recommended tutorial is below 👇
Setup SSL with Certbot on Apache #
SSL (Secure Socket Layer) is crucial for securing data transmitted between the user’s browser and your web server. Certbot is a free, open-source software tool for automatically managing SSL certificates.
In this guide, we’ll walk through the process of setting up SSL for your Apache web server using Certbot.
Before you begin, make sure you have:
An Apache web server installed.
A registered domain pointing to your server’s IP address.
The domain is accessible over HTTP (port 80).
Step 1: SSH into the server
- Access the server hosting your HTTP website via SSH using a user account with sudo privileges.
Step 2: Install snapd
- Ensure that you install snapd and carefully follow any provided instructions to activate classic snap support.
- Refer to the instructions provided on snapcraft’s website for installing snapd.
install snapdStep 3: Remove certbot-auto and any Certbot OS packages
- If you have any Certbot packages installed via an OS package manager such as apt, it’s advisable to uninstall them before installing the Certbot snap. This ensures that when you execute the command “certbot,” the snap version is utilized rather than the one from your OS package manager. For removing the certbot from the system run the following command-
sudo apt-get remove certbotStep 4: Install Certbot
- Execute this command on the command line of your machine to install Certbot.
sudo snap install --classic certbotStep 6: Prepare the Certbot command
- Run the following instruction on the command line of your machine to ensure that the certbot command can be executed.
sudo ln -s /snap/bin/certbot /usr/bin/certbotStep 7: Choose how you’d like to run Certbot
- Either get and install your certificates…
- Run this command to get a certificate and have Certbot edit your apache configuration automatically to serve it, turning on HTTPS access in a single step.
sudo certbot --apache- Or, just get a certificate
- If you’re feeling more conservative and would like to make the changes to your apache configuration by hand, run this command.
sudo certbot certonly --apacheStep 8: Test automatic renewal
- he Certbot packages on your system come with a cron job or systemd timer that will renew your certificates automatically before they expire. You will not need to run Certbot again, unless you change your configuration. You can test automatic renewal for your certificates by running this command:
sudo certbot renew --dry-runStep 9: Confirm that Certbot worked
To confirm that your site is set up properly, visit https://yourwebsite.com/ in your browser and look for the lock icon in the URL bar.
TIP
Recommended tutorial is below 👇
MySQL Database and User Setup #
Setting up a MySQL database involves creating a database, creating a user, and assigning that user appropriate privileges. This guide will walk you through the process using MySQL commands.
Before you begin, make sure you have:
- MySQL installed on your server.
- MySQL root access or a user with sufficient privileges.
Step 1: Log in to MySQL
sudo mysqlStep 2: Create a Database
CREATE DATABASE your_database_name;Replace your_database_name with the desired name for your database.
Step 3: Create a MySQL User
CREATE USER 'your_username'@'localhost' IDENTIFIED BY 'your_password';Replace your_username with the desired username and your_password with the desired password for the user.
Step 4: Grant All Privileges to the User for the Database
GRANT ALL PRIVILEGES ON your_database_name.* TO 'your_username'@'localhost';Step 4: Flush the privileges
FLUSH PRIVILEGES;Replace your_database_name with the name of the database created in Step 2 and your_username with the username created in Step 3
Step 5: Exit MySQL
EXIT;phpMyadmin setup (optional) #
Run the following commands for installing phpmyadmin in your system
sudo apt updatesudo apt install phpmyadmin php-mbstring php-zip php-gd php-json php-curlHere are the options you should choose when prompted in order to configure your installation correctly:
- For the server selection, choose apache2
Warning
When the prompt appears, “apache2” is highlighted, but not selected. If you do not hit SPACE to select Apache, the installer will not move the necessary files during installation. Hit SPACE, TAB, and then ENTER to select Apache.
- Select Yes when asked whether to use dbconfig-common to set up the database
- You will then be asked to choose and confirm a MySQL application password for phpMyAdmin
Restart the apache2 server-
sudo systemctl restart apache2Project Setup #
Upload your project in /var/www/your_domain.com/public_html and unzip the file
apt install unzipunzip your_file_nameThen give permission to some specific files & folders
sudo chmod 755 .env
sudo chmod 777 modules_statuses.json
sudo chmod 777 Providers/RouteServiceProvider.php
sudo chmod -R 777 storage
sudo chmod -R 777 bootstrap/cache
sudo chmod -R 777 resources/lang
Now you are ready to go for the installation.


