


In today’s world, convenience is key. Nothing beats the ease of ordering groceries online. That’s why many businesses are trying to build an online grocery marketplace solution with expert help.
Now is the chance to show your expertise and lock in the next big project. In this blog, I will show you how to develop an online grocery delivery solution with the market-leading software – 6amMart.
So let’s get started!
The Market Demand of Online Grocery Shops
The grocery delivery industry is projected to reach a market volume of US$1,381.00bn by 2029.
So, what is making the online grocery store industry booming? Well –
Convenience: Convenience is both the King and Queen these days. People are busy! Online grocery marketplace works as a massive time saver and a lifesaver for busy people with limited mobility options.
Wider Selection, More Choice: Online stores aren’t limited by physical space. They can offer a wider variety of products than your local supermarket.
Comparison Shopping: Online grocery shopping makes comparison shopping a breeze. You can easily compare prices and product information across different stores, ensuring you get the best deals.
So, what does this mean for developers?
In one sentence – It’s a golden opportunity.
Building user-friendly and efficient online grocery platforms is in high demand. With the market booming, developers have the chance to create innovative solutions and fulfill the needs of both business owners and consumers.
Prerequisite to Develop Online Grocery Marketplace with 6amMart
Before developing your online grocery marketplace ordering software with 6amMart, ensure you’re fully prepared with all the essential requirements –
- 6amMart Multi Vendor eCommerce Solution: A complete solution that lets you operate and control various business modules centrally.
It comes with –
– Admin Panel
– Customer App
– Store Panel
– Flutter Website
– Store App
– Deliveryman App
- Server: The digital hub for storing and sharing website data. This ensures smooth transactions and provides a layer of security for users.
- Domain & Hosting: This is your website’s unique address and space on the internet, which allows users to access it at any time. Choosing the right domain and hosting provider is crucial for ensuring your website runs smoothly and is easily accessible.
- SSL Certificate: This certificate provides a secure and encrypted connection between users and your website, ensuring all communication is safe and protected against hackers.
- Real-time Backup: Real-time backup protects your website against data loss. This feature provides continuous backup of your website’s data, which serves as a safety net in case of any unexpected issues. With a real-time backup in place, you can rest assured that your website will always be up and running, even in a technical issue.
Steps to Build an Online Grocery Marketplace Solution with 6amMart
Building an online grocery marketplace with 6amMart is easier compared to starting from scratch or using other CMS platforms. These platforms may lack specialized features essential for grocery businesses.
With 6amMart you just need to follow a few easy steps to install and set up the module.
But first, check if your server meets the below requirements or not:
- PHP version 8.1 or higher
- MySQL version 5.7 or later
- Mod_rewrite for Apache
- BCMath PHP extension
- Ctype PHP extension
- JSON extension
- Mbstring extension
- OpenSSL extension
- PDO extension
- Tokenizer extension
- XML extension
- Zip extension
- Fileinfo extension
- Gd extension
- Sodium extension
- Mysql PDO extension
Now let me walk you through the steps of setting up 6amMart online grocery marketplace ordering software.
Step 1: Database Setup
- Go to MySQL and create a new database.
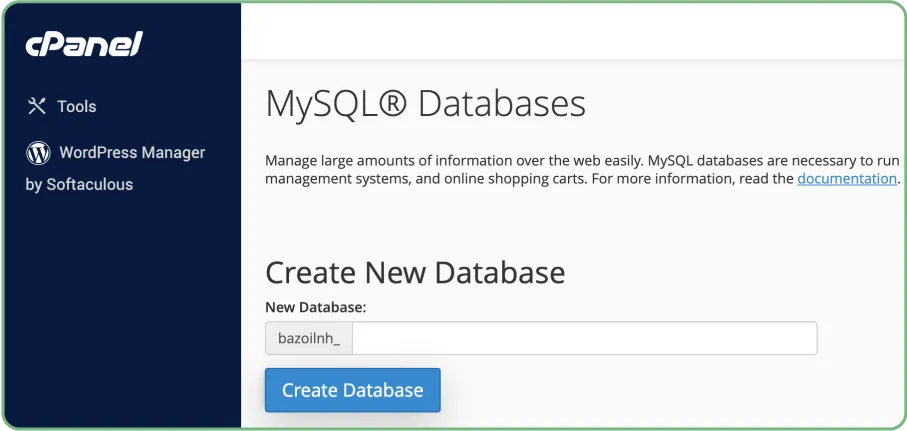
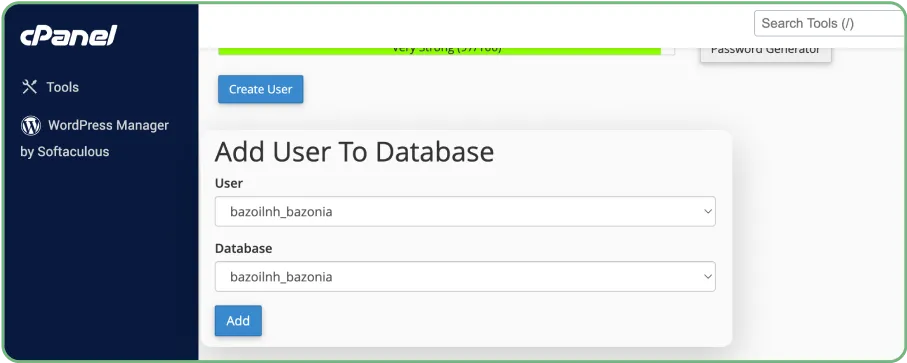
- Create a new user for the database by providing Username and Password.
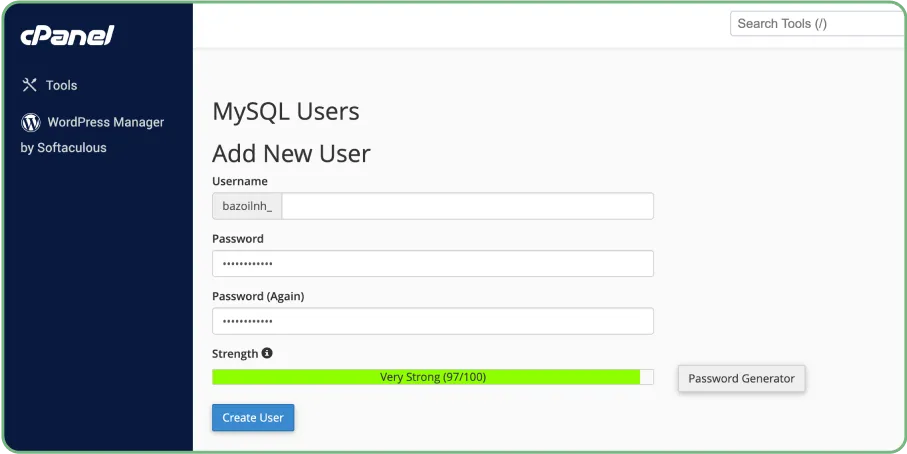
- Add the recently created user to the database.
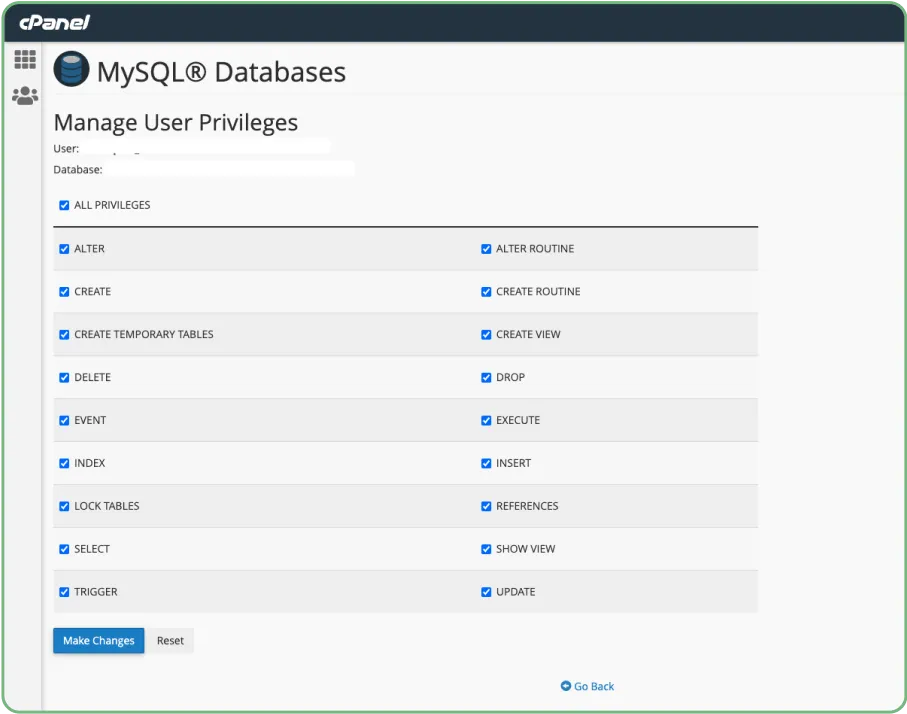
- Give privileges to the user you have created recently.
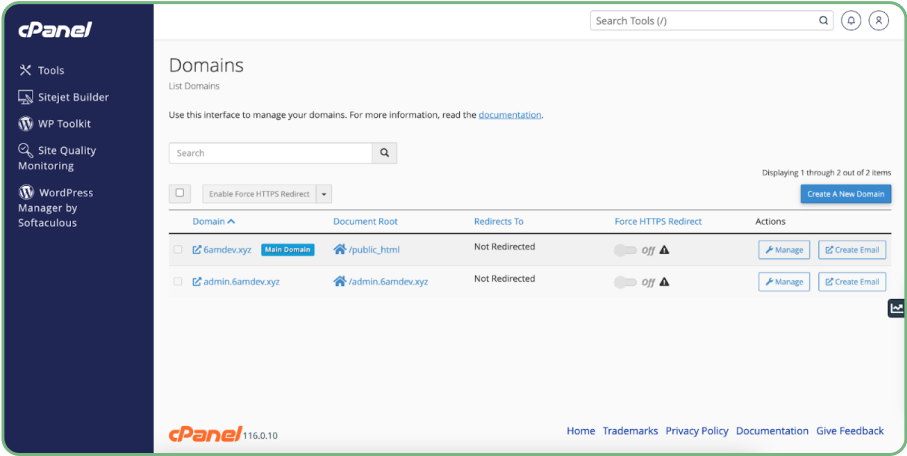
Step 2: Domain Configuration
Access your cPanel and find the domain configuration page.
Use your main domain for the customer web panel and create a subdomain like ‘admin.example.com’ for the admin panel.
Next, set up the server by installing LAMP Stack, configuring domain/sub-domain, setting up SSL with Certbot on Apache, and uploading the project.
Step 3: Installation
Download the Admin New Install.zip file from CodeCanyon, then upload it to your directory and extract it.
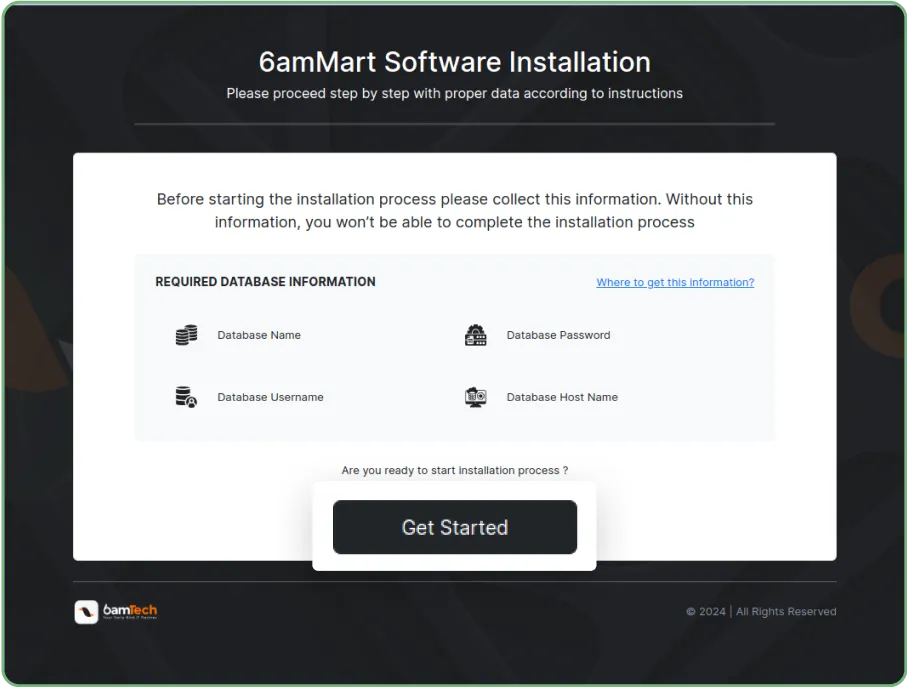
Then go to your site URL, and you will be automatically taken to the installation page.
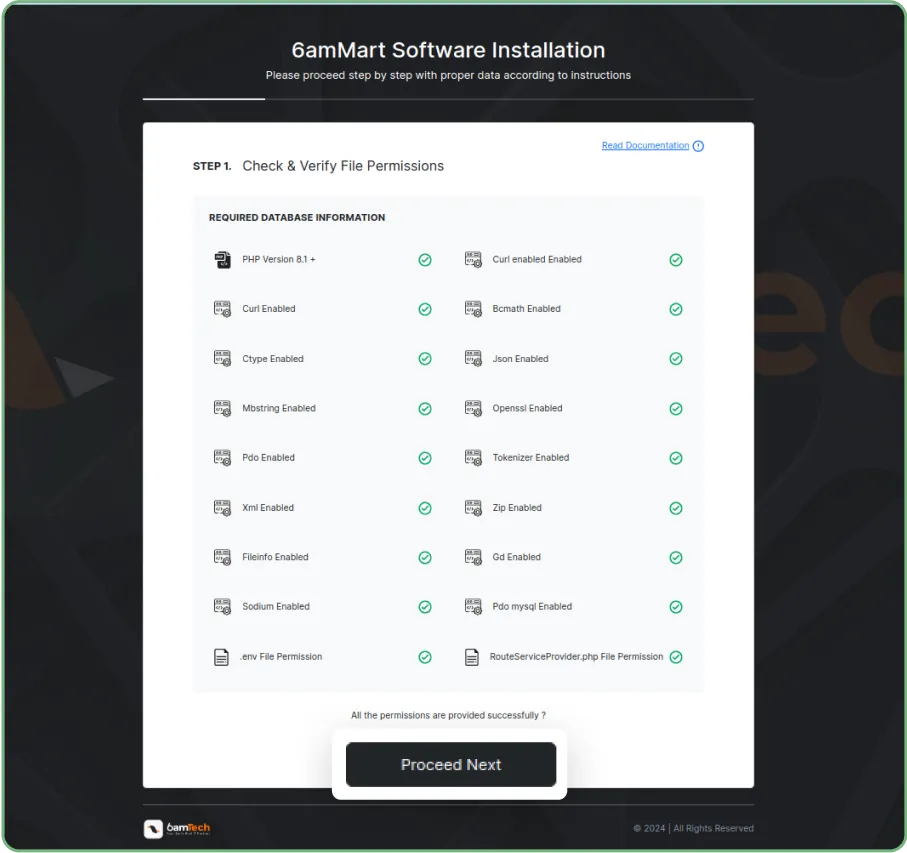
- Now click “Get Started” to start the installation process.
- Ensure all necessary extensions and permissions are enabled, then proceed by clicking “Proceed Next.”
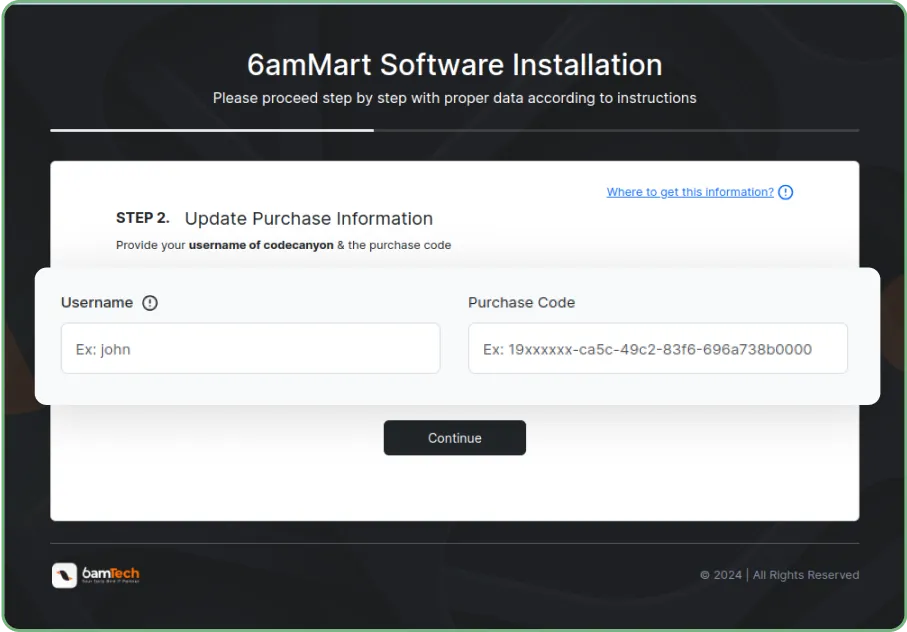
- Enter your CodeCanyon Username and Purchase Code, and hit the “Continue” button to proceed to the next step.
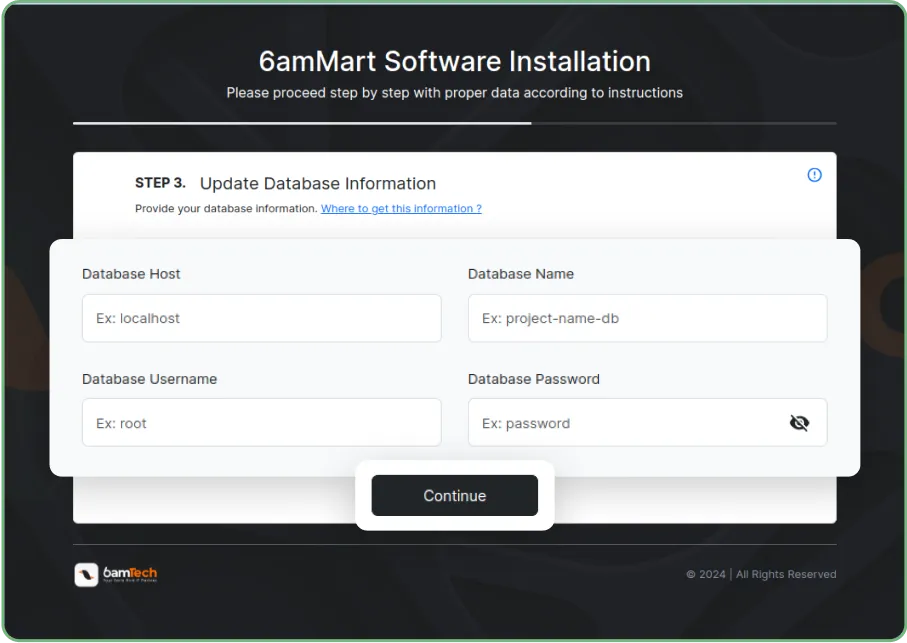
- Update the Database information by entering the Database Host, Database Name, Database Username, and Password. Click “Continue” to proceed to the next step.
- Press the “Click Here” button to import the database.

Step 4: Admin Account Settings
Enter your business name, admin name, phone number, and email to create the super admin credential for your admin panel. Finally, click “Complete Installation” to complete the process.

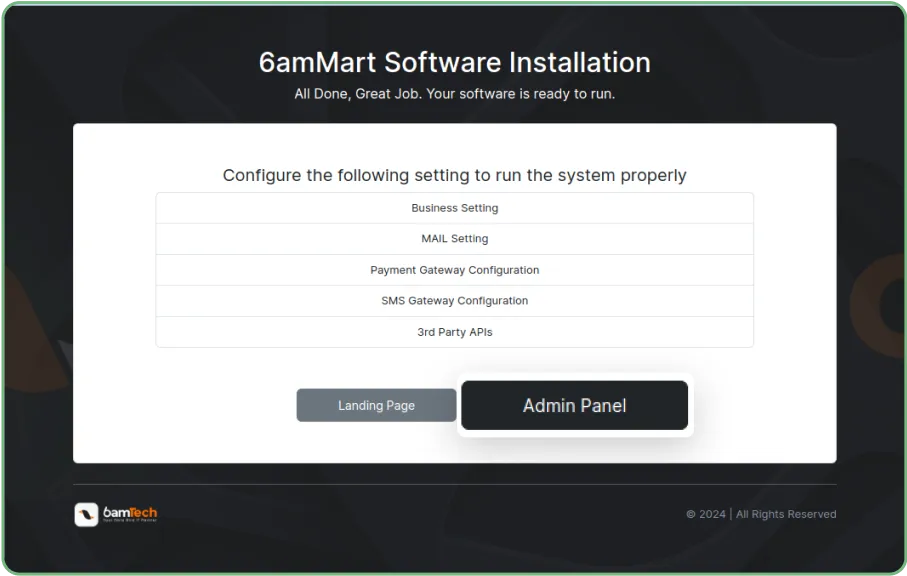
Step 5: Admin Panel Configurations
Click on the “Admin Panel” button to go directly to the admin panel of 6amMart.
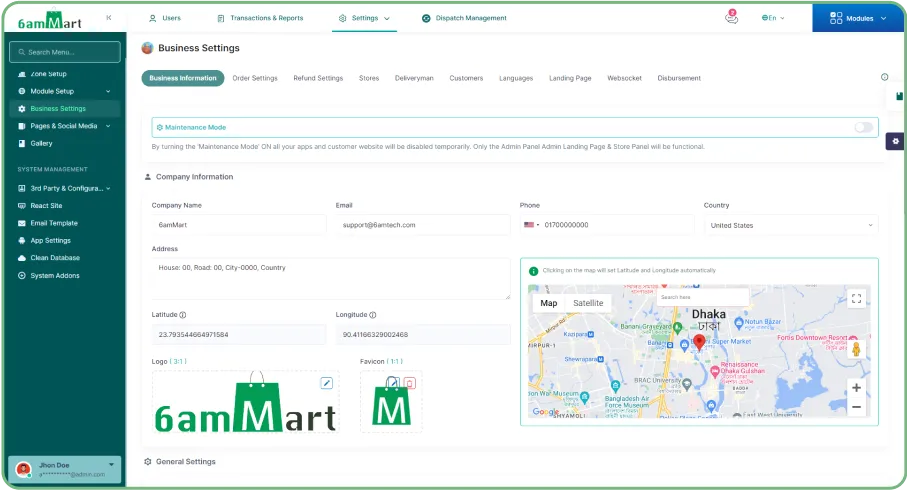
Step 6: Business Settings
You need to configure your system using the Business Settings tab before you set up the “Grocery Module.”
Set your –
- Business Zone
- Pages and Social Media
- 3rd Party APIs
- Payment Gateway Configuration
- SMS Gateway Configuration
Step 7: Module Setup
- Now click on the “Module Setup” to expand the drop-down menu. From there, click on the “Add Business Module” to add the –
– Business Module Name
– Business Module Description
( The information is filled here for better demonstration)
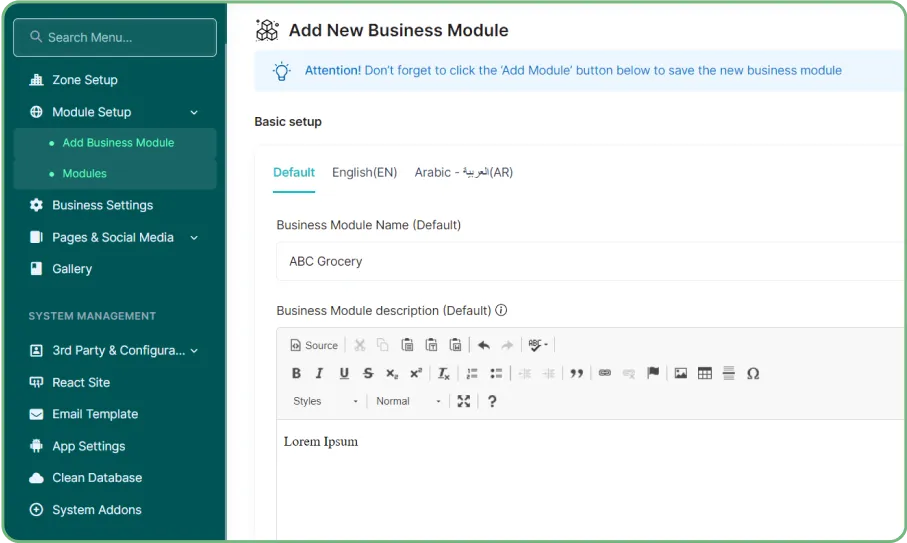
Path: Admin Panel>Settings>Module Setup>Add Business Module
- After that, select the business module type. Here we will be choosing “Grocery” and related images for “Icon” and “Thumbnail.” Now click “Add Module” to set up the grocery module.
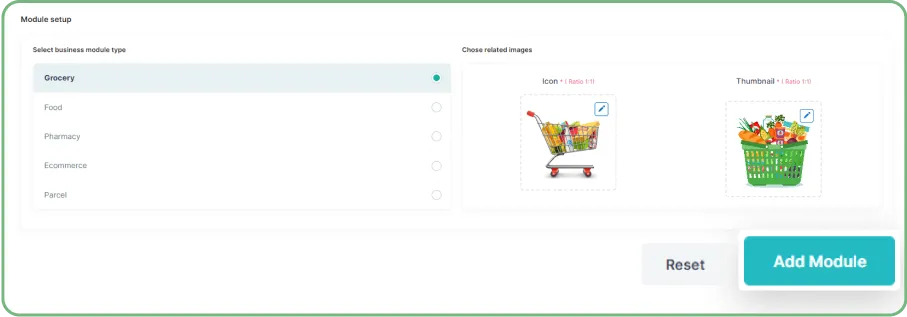
Path: Admin Panel>Settings>Module Setup>Add Business Module
- You can view the added business module from the modules list.
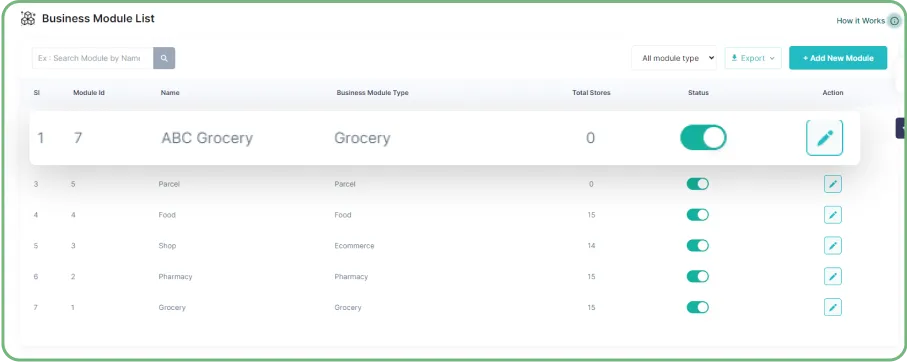
Path:Admin Panel>Settings>Module Setup>Modules
Step 8: Zone Setup
To operate the grocery marketplace successfully, you need to connect the “Module” to a business zone. For this, set the zone using the map and add a “Business Zone Name”.
Click on “Submit” to save.
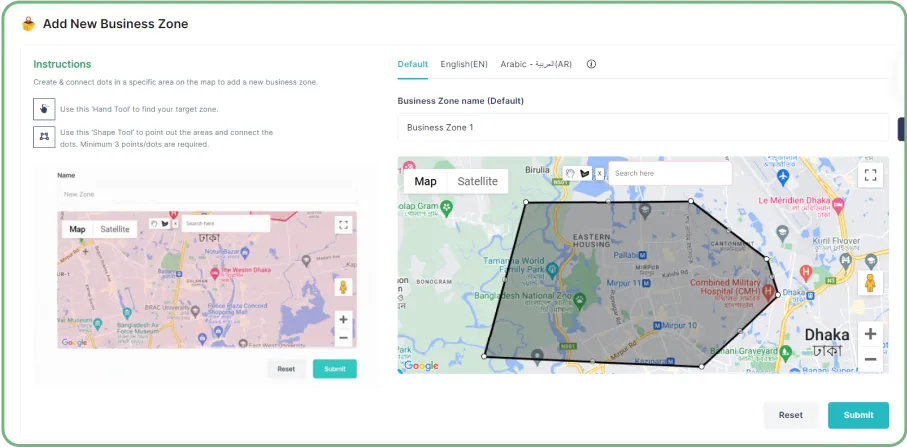
Path: Admin Panel>Settings>Zone Setup
Step 9: Connect Zone with Module
To make the grocery marketplace function properly, you need to select the Payment Method and Business Modules with other necessary details on the zone settings page.

Please note that you must choose at least one “Payment Method” to activate the zone.
Then select the “Increase Delivery Charge” and mention the reason in the “Increase Delivery Charge Message” if it aligns with the business goals.
Then choose the “Grocery” Business Module along with the “Per km Delivery Charge”, “Minimum Delivery Charge”, “Maximum Delivery Charge,” and “Maximum COD Order Amount”.
After setting up everything, click on “Update” to save the data.
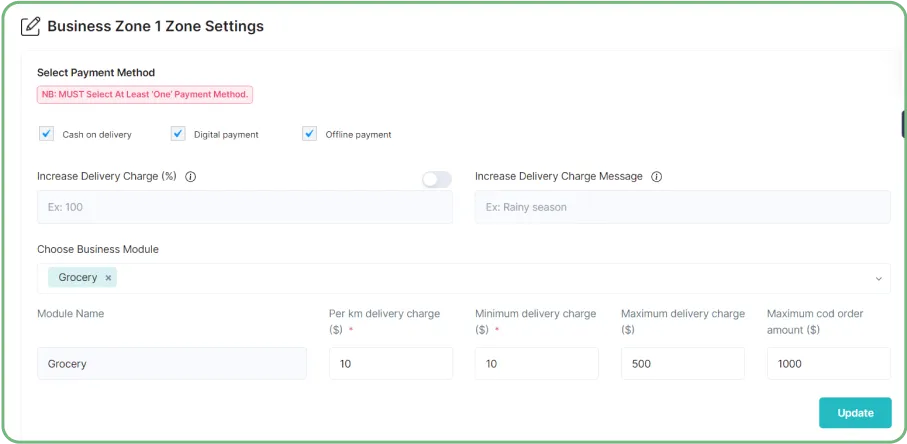
Path:Admin Panel>Business Settings>Zone>Module-setup
Watch this easy and detailed tutorial to set up the business zone with just a few clicks!
Video: Business Zone Setup Tutorial
Step 10: Grocery Dashboard
By clicking on the drop-down of “Module Section”, you will find a list of the modules. From there, choose “Grocery,” and you will be redirected to the Dashboard.
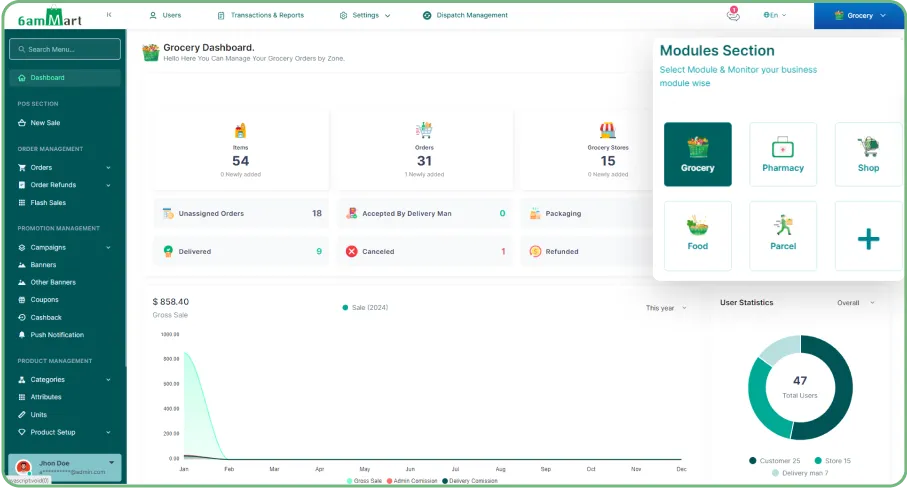
Path: Admin Panel>Module Section>Grocery
From here, you can set up Products, Categories, Attributes, Stores, Promotions, etc as per the business requirements.
This completes the total setup of the online grocery marketplace solution through 6amMart.
Final Words
That’s it! You’ve now got the roadmap to building your very own online grocery marketplace solution. Remember, a successful marketplace depends on a user-friendly platform, seamless integrations, and powerful tools for both vendors and customers. 6amMart empowers you to deliver all that and more.
I hope this blog helps in your development journey. See you in the next one!
FAQs
What are the advantages of using 6amMart to build my online grocery marketplace?
6amMart offers a comprehensive solution with features like multi vendor support, mobile app compatibility, and built-in promotional tools to streamline the development process.
Does 6amMart offer any technical documentation or support for developers?
Absolutely! 6amMart provides comprehensive developer documentation, tutorials, and ongoing support to ensure a smooth development process.
Is there a free trial available for 6amMart so I can explore the platform before committing?
You can explore the demo for free to test the platform’s functionalities and see if it meets your development needs.
What features should I look for in online grocery marketplace delivery software?
Essential features include order management, customer management, store management, route optimization, delivery tracking, inventory management tools, and customer communication functionalities.
Meet Mehrin! A technical writer with a Computer Science background. She combines her academic knowledge & creativity to transform complex facts into engaging content. With a sharp eye for detail, she keeps readers updated on tech trends. Outside of writing, she’s a visual storyteller, capturing life’s moments through photography.